Showing posts with label dimensional leaves. Show all posts

Thursday, August 8, 2013

Together LO - The Scrapbook Store - Scrap Around the World Challenge

 ...loving my DT pack from The Scrapbook Store, with the Melissa Frances, Classic Elegance papers and elements. Lots of texture in this layout, using the Kaisercraft 'Bubbles' Template, along with texture paste - coloured using a mixture of Perfect Pearls, and Mists from Lindy's Stamp Gang.

Also this month, I have joined in the new challenge site, Scrap Around the World - I have been itching to join in with the fun of this new challenge sit,e and finally 'completed' a layout using the Inspirational Mood board and Sketch below. You can find the current challenge 'HERE'.  I adore the sketch, by Julianne!!

I was inspired by the top two images in Eila's Mood board, the softness of the gold/white/pink colour hue's. I love charms of all types, so added in a key which is available in TSS 'HERE' ...
These photographs are just precious!  Three best friends, having the time of their life (no doubt) on the beach - where I have no idea, who they are .... no idea sadly, but are in my photo collection.  Hopefully one day I will find out the story behind these photographs.
Cheery Lynn Design dies were used behind each of the photographs and also mini dies beneath the other flowers. A complete list of dies with links can be found below in the materials list. I grouped together flowers in an arrangement - some flowers were from my stash basket and others from TSS.
Of course, I embossed the title 'Together'...... using Stampendous embossing powder - Aged Silver - which really looks like a light golden colour, beautiful actually.
Well, that is it for me today ... thanks for visiting!!
Sandie

Materials:

Wednesday, March 6, 2013

Grandparents - My Creative Scrapbook, Limited Edition March Kit

The reveal is happening for the March, My Creative Scrapbook Kit for March!  I worked with the magnificent Limited Edition kit for March ...and ohhh my goodness, what a fabulous line of products. I had an absolute ball in the creating department!  Do call on over to the 'Gallery' for all the design team creations, and some major inspiration.  Don't forget the DT, also do a tutorial on some elements of their work throughout the month too, over on the My Creative Scrapbook Blog.  This month, I created a tutorial on how I make my leaves - which can be seen in this layout.  If you do not have punches and die's - then this is a fabulous way of making leaves for any floral arrangement.
The photograph is of my Maternal Grandparents.  I love this photograph, as it shows the love they had for one-another.  Their lives were wrought with so many heartaches, but through everything they still managed to be happy, and share lots of love.  Together, they raised 8 children, and I lost count of the Grandchildren, and Great-Grandchildren.
 I used to hide behind my Grandfather's chair when he was busy watching television (normally the news) - I'd so want to get his attention, so would reach over the chair, grab one strand of his hair, pluck it and RUN!  LOL  He used to chase me, till he caught me and give me a huge bear hug.  I'm amazed my Grandpa had any hair left on his head - this was a regular occurrence.  My Grandma and Grandpa were brilliant piano players, and I used to sit next to them as they played.  I am blessed, so very blessed, to have many, many, wonderful memories of my 'Grandparents'....
and I miss them terribly...
The Limited Edition Kit hosted some Kaisercraft and Websters papers - I fussy-cut a lot of the Websters page elements out and used in my floral arrangement.  Prima metal embellishments can be found scattered throughout the Prima flowers. 
A close up of the 'leaves' I created, and will be up later on in the month on the My Creative Scrapbook Blog.  I actually get a lot of questions in regards to my foliage, so thought this would be a great one to do a tutorial on - they are simple and look very effective.
I will be back throughout the month, to show some more creations...
Sandie
P.S  Word verification has been set on my blog, as the amount of spam I am receiving is frightening!

Friday, December 14, 2012

Shabby Chic Mouse Trap Note Pad Holder - Cheery Lynn Designs

This week for Cheery Lynn Designs, I have revamped a mouse-trap into a note holder, using a range of dies.  I have spied these on many social media outlets and just had to try one.  These would make wonderful last minute Christmas presents!

Do not forget my Christmas Blog Candy Give-Away, details can be found 'HERE'. 

 On the back of the 'trap' are 3 flat magnets, so the note holder can be placed on the fridge.
Firstly, I spray painted the mouse-trap in white, then started decorating.  The base below the mouse-trap is the Swedish Spring Oval Frame, which was cut from chipboard, and spray painted white.  Along each side of the mouse-trap the Lace Light Deco Border was used to decorate.  To create the main focal rose, I used the Miniature, Medium, and Large rose die's, just building the rose in layers. Beneath the rose, I created a doily by cutting the Lace Corner Deco D 4 times, and adhered all four edges together to form a miniature doily.  You may need to enlarge the photographs to see this detail. 
Foliage was created in and round the rose using the smallest leaf from the Small Leaves 2Wreath Strip, and Olive Branches which were cut into smaller segments. 

The 'today' sentiment was stamped onto the Sentiment Frame, and mounted on foam tape for dimension.  
I will be back early in the new year (4th Jan) with more Cheery Lynn Designs.  Bj, Mike and Sandy have given the design team some time off over Christmas to spend with family (very spoilt).  AND, in the new year (mid January) the design team will be revealing all the CHA release dies.  I seriously cannot wait to show you the new release, they are fabulous!!  

The Cheery Lynn Designs Challenge Blog, will still be hosting challenges, so do call on over and check each challenge out, and of course enter for a chance to win a $20 shopping voucher.

xxx

Materials
Medium Rose (B154)
Large Rose (B155)
Wreath Strip (B216)
Chipboard
Foam Tape
Adhesive
Sentiment Stamp
Mouse Trap
Glitz 'French Kiss' 6 X 6 Paper Pad

Wednesday, May 16, 2012

Make a Wish, They Do Come True - Creative Inspiration Paint

This fortnights card, was created for a very special friend, about to embark on the venture of a lifetime, with moving to USA to broaden her areas of study.  I wanted to make a card which is my interpretation of dreams coming true for her - an of course a splatter and coat of Creative Inspiration Paints was a 'must'.  

The beautiful Prima Marketing 'Fairy Belle' 6' X 6" pad was used to create this card, and every component was covered in a generous coat of Creative Inspiration Paint. The ballerina fairy, and butterflies were painted with Fairy Dust - seemed most appropriate and left the most glorious touch to the image/s. 'Mellow Yellow' was applied to the 'yellow' butterfly on the right.
The base of the card was created using the Cheery Lynn Designs, French Flair Classic Series, and then topped with the Mini Pearl French Flair.  Also, the foliage (Dimensional Leaves and Olive Branches) were painted with several coats of 'Green Olive' Paint, as well as, 'Evergreen' to create a depth of shadow on one edge.

Each of the flowers was touched with 'Gold', just highlighting each of the petals.
The Imaginarium Designs Chipboard - 3" X 2" Swirly Frame (IDFR0004) was painted using Antique Gold, in a haphazard manner, leaving patches with no paint.  A light sponge of 'Gold' Creative Inspirations Paint was applied over the entire frame leaving a gorgeous, two-toned -gold, with amazing shimmer.

The challenge theme on the Creative Inspirations Blog is Mother's Day this week, and can be found 'Here'. Each month, one person will win 5 jars of paint in the colors of their choice. There is a top 3 each week, and a winner chosen randomly from all those who have participated that month, so make sure to join in on our challenges each week!

Supplies:
Gold
Green Olive
Evergreen
Mellow Yellow
Antique Gold
Fairy Dust
Beige
Imaginarium Designs: Chipboard - 3" X 2" Swirly Frame (IDFR0004)
Helmar 450 Quick Dry Adhesive
Paper/Cardstock: Prima Marketing 6 X 6" Fairy Belle Paper Pad, Shimmer Cardstock, Core'dinations Cardstock
Dies: Cheery Lynn Designs: Olive Branches, Dimensional Leaves, Mini Pearl French Flair, French Flair Series.  Martha Stewart: Pine Needle Punch

Tuesday, March 27, 2012

Floral Ornament & Goodbye Cheery Lynn Designs


My blog post today is my last one for Cheery Lynn Designs.  I will miss creating for such a lovely company, though will enjoy my visits back to the blog. Cheery Lynn Designs is a fantastic company to design for, and for me personally, it has been a wonderful learning experience, and one I will always be truly grateful for. I want to thank Mike and Bj Dwyan (owners of Cheery Lynn Designs) for their hospitality in having me as part of their 2011/2012 design team!!

...and a BIG thank you to Sandy, our DT coordinator who has been an amazing source of information, inspiration and help to the whole team...You really do an amazing job!

To the other design members, it has been so much fun working with you, and I am really looking forwards to what the new Design Team members will bring to the team - welcome aboard!

Cheery Lynn Designs has some exciting news coming up soon, so please stay tuned on the Cheery Lynn Designs blog for further information, which will be posted around the 1st of April!
It is 'must not miss' news!


Anyhow......I have created something a little different - two lace and rose ornaments.  I placed ribbon on the back of mine, but these could also be used to decorate tags or layouts.  


To create the base of the ornament, I used the Frills and Hearts Border for the first ornament, and the Anastasia Border for the second.  The photo below shows how I constructed the base. I used the Eazi Score board by Diamond Card Craft, scoring evenly along the length of the die cut, and then fan folded each border.  You can find the Eazi-Score Board/s "HERE". 

Thank you to Phillis Gullick, who provided the score board, embossing tool and book to all the design team members.  I am enjoying my creating with your products! 

I cut several Scalloped Window Stacker circles (smallest, and next size up).  The larger circle out of the two was used to adhere the borders upon.  The smallest circle was used on top of the lace base, to adhere the flower upon so I had an even surface to work upon.


The photograph below is a close up of the Frills and Heart Border ornament.  The flower was created using the Cuties 2.  For this flower I curled each of the petal tips outwards using a quilling tool, and lightly inked the edges with Aged Mahogany distress ink. 

The foliage consists of Olive Branches, and the Cuties 4.  The Cuties 4 makes the perfect sized leaves for this sized flower.  All you do is remove the petals from the die cut!

Both projects were constructed using strong adhesive glue dots. Larger glue dots were used to adhere flower, and the Scalloped Window Stacker circles.  Tiny glue dots were used for the foliage. 


The rose in the below photograph was created using the Miniature Rose and Medium Rose. As I was constructing the rose (especially the outer layers) I used a quilling tool to curl the petals under or upwards 'slightly' to give the petals a more realistic appearance.

The leaves (above photograph) I used the Small Dimensional Leaves 2. Again, I rolled the edges of the leaves upwards and outwards, to create realism.

Dies Used:


This week on the Cheery Lynn Designs blog, the challenge theme is 'Things with Wings' - please come and join in the fun of the challenge, you can create anything at all - layout, card, off the page project, etc. as long as there is at least one Cheery Lynn Designs die used in your creation (of course, more is better).  You have the chance of winning a $20 voucher to spend in store with Cheery Lynn Designs.

Have a fantastic, creative week ...
Sandie

Tuesday, March 20, 2012

Vintage Inspired Tags - Cheery Lynn Designs

For Cheery Lynn Designs this week I have created two victorian inspired tags.  The tag bases were created using the new release 'Reflections Boutique', Scalloped Coved Rectangle Series.  The above tag consists of the two smaller sizes, which I adapted to the size I required for my tag.  The smallest size is perfect for using as a photo-mount.

I used the new release Lace Corner Deco F to decorate each corner.  The range of corner dies consists of 6 different ranges, each range has a series of 3 dies within.  I used Creative Inspirations Paint (beige) to colour the corner pieces.


The Flower was created using the smallest die in Judy's Blooms.  The edges of the leaf have been curled up using a quilling tool, and adhered in layers.  I added some stamens to the centre.  The smallest Dimensional Leaves 2 Small leaf, and Olive Branches were used as foliage.  These elements were also painted using Creative Inspirations Paint (Olive Green).

Another tag created the same as 'above', though using a different corner die in the 
Lace Corner Deco F.  The below flower was creating using the Darling Daisies die, and the leaves 
are Cuties4 (petals removed from die cut to form leaves).


Dies Used:

This week the challenge at the Cheery Lynn Designs blog is "Easter", to find out all the details, click "HERE", for your chance to win a $20 Cheery Lynn Designs voucher. 

Have a fun and creative week!
Sandie

Tuesday, March 6, 2012

Every Time You Smile Card - Cheery Lynn Designs


 Hi Everyone,
The new Reflections Boutique Series of dies by Cheery Lynn Designs allow so much scope in creativity.  The system of each set allows for the user to determine the length of the die cuts and of course the set comes in a variety of sizes, and numerous patterns.  The Reflection Boutique Series I have used on my card is the Royal Coved Rectangle Mega Doily. The whole series can be found "HERE".

For card-makers the dies can be placed on smaller machines, with cardstock folded in half to create decorative edged card bases, in varying sizes.  Another use is for making tags, which I will show you in a future post. Or, they can be used for making frames for photographs on layouts or on cards as I have done so above. 

Mike has completed several videos on these wonderful die sets.  The Reflection Boutique Series can be viewed "HERE", and the workshop video can be seen "HERE".


For this weeks card, I have also completed a tutorial (which can be found "HERE") on the Darling Daisies flower (above and below), and also a different way of creating leaves using the Cuties 4.


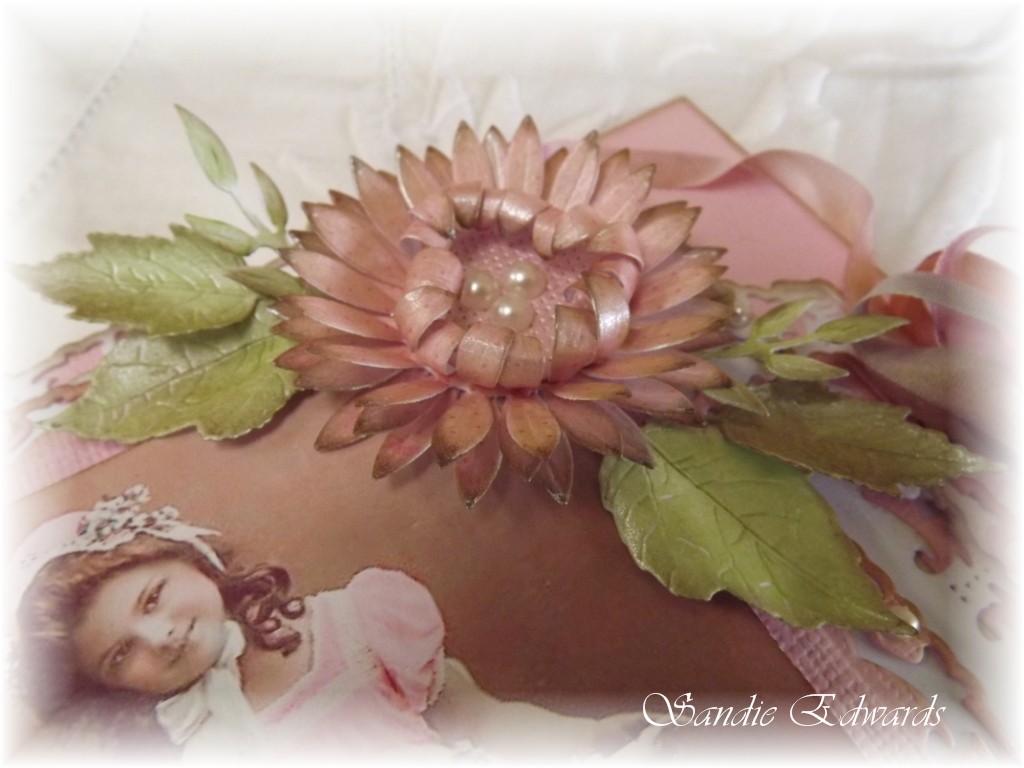
The flower (above and below) was created using the Sunflower die.  Five layers were cut from the actual Sunflower die.  Each of the flower bases I painted with Creative Inspirations Paint to leave a beautiful shimmer.  Creative Inspirations Paint is sheer, so applying a light coat allows for the beautiful paper beneath to still be seen.  If you wish to cover the paper beneath, just add a few more coats of paint.  The best part is the paint dries quickly, so there is no major waiting times!  I was able to ink my edges straight after painting all my flower pieces.

The Sunflower was constructed with 4 layers for the base.  I used glossy accents (very small portion) to adhere each layer together - making sure each leave is staggered from the one beneath.  The remaining Sunflower die cut was turned upside down and the petals rolled inwards using a skewer (the petals are rolled inwards, from being upside down, so that the painted side shows when petals are rolled in).  Adhere to base of Sunflower, then adhere the centre of Sunflower to the middle (this hides the inside of the paper as your flower is upside down).  I placed several pearl pieces to the centre of my flower, but this isn't really necessary as the die cut centre piece is embossed.


The Dimensional Leaves and the tips of the Olive Branches were used to complete my flower.  The Dimensional Leaves were also painted with Creative Inspirations Paint, then curled using a skewer to add a more realistic appearance. If you click on the photograph, it will enlarge so you can see the detail more of how I have rolled the leaves around the skewer.  Edges were inked with 'Walnut Stain' distress ink.  The paint seeps into the fine detail of the leaves, showing off the veins of the leaves ... is very pretty. 


Inside of the card I used the Royal Coved Rectangle Mega Doily again to create a frame for the sentiment.  The foliage of the Japanese Garden Lace Oval die was used to decorate.  I added a hand-dyed silk ribbon to decorate.

This weeks challenge of the Cheery Lynn Designs Blog is 'Doilies', with a chance to win a $20 voucher to spend at Cheery Lynn Designs.  You can find the challenge details "HERE". Also, we are in the last few days of the Design Team call, you can see all the information "HERE".

Hope everyone has a fantastic week!!
Dies Used:
DL136 Japanese Garden Lace Oval (inside branches used)
DL192 Royal Coved Rectangle Mega Doily (Reflections Boutique Series)

Tuesday, January 31, 2012

Cheery Lynn Designs - Baby Boy Brag Book


Front Cover
Hi Everyone..  This week for Cheery Lynn Designs I have created a "Baby Boy, Brag Book".  I was reading a thread on a forum recently about how difficult it is to make a baby book for a boy, as you cannot add flowers.  Well, for me personally - I add flowers, I just make them "BLUE"!!

Due to the length of this post, I will not go into the nitty gritty details - just wondering if nitty gritty is an Australian saying, so will explain it means 'small details'. 
Close Up of Medium Rose
Above is a close up of the Medium Rose, which is constructed by rolling the middle, and building up in layers.  You can make them tight, open, or however takes your fancy. I will do a tutorial soon on how I do my roses, as it seems all of us DT girls do ours differently.

Page 1
The flowers on Page 1: The large flower with button, being made from the Cuties 4.  The smaller white flowers are from the Flower Chain Border (I just removed flowers from border), I included the medium sized Darling Daisies in the middle of each - they replicate stamens.  The tiny flowers are the inserts to the Snow Flake Edger Border die.  I really like those inserts, they could have 'many' uses when making flowers!

Page 2 below, I embossed the cardstock using the Black Eyed Susan Embossing Plate.

Page 2
Page 3
Page 3 and 4 (above and below) I have used the Cheery Blossoms and Dimensional Leaves.

Page 4
Page 5 (below) I used the Roses and Leaves Embossing Plate.  I love the beautiful detail of the embossed design using the Cheery Lynn Designs Embossing Plates, in conjunction with the Embossing Kit!! The French Flair-Classic Series was used to create journaling areas.

Page 5

Page 6
Page 6 (above) includes the Medium Rose, constructed more in a flat manner and not 3 dimensional.  I just used an awl to round the leaves on a computer mouse mat. 

Page 7
Judy's Blooms, and the Stacker Leaves on Page 7 (above), I always double the layers of the die to create more volume.

Page 8
The flower on Page 8 (above) was created using the new release Fransesca Border die.  To create a flower like this, all you need to do is score at regular intervals over the whole die cut, and fold like a fan.  Adhere the two ends together with a strong adhesive, and push down to form flower - adhere to the smallest circle in the Scalloped Window Stackers Series.

Page 9
Another rose using the Cuties 3 on page 9 (above).

Page 10
Using Snowflake 6 to add a little character to my flower arrangement.  Snowflakes can be used in so many other creations, besides winter or Christmas!
Back Cover

Journal Tag
Dies Used:
B154 Medium Rose

Do not forget this weeks challenge, with the theme being "Sweethearts", all the details can be found "HERE".  You have a chance of winning a $20 shopping voucher!!!  

I am entering my brag book into the following challenges:
Die Cutting Divas with the theme "anything goes"
also... My Time to Craft Challenge Blog with the theme "A for Adorable"
Have a great, and creative week...
Sandie