Showing posts with label stacker flowers. Show all posts

Wednesday, July 24, 2013

Love is a Beautiful Thing... Always LO and Prima Art Doll Tag - The Scrapbook Store

My last projects for The Scrapbook Store this month, is a layout that I created for my Mother using the Websters Pages, Modern Romance Paper Collection

The Prima Marketing, Mixed Media stamp set was used in corners and the leaves coloured using Copic Markers, and the white cardstock beneath was splattered using Lindy's Stamp Gang, Mist.
The embossing powder is amazing, I am so in LOVE with this product and brand .... the speckled pieces of pink glitter, flat white chunks and gold is just amazing.  You can find all the Stampendous embossing powders 'HERE' and the trial set 'HERE'.
Elements from the papers were fussy cut, and Silhouette SVG doily file was used beneath the photograph.... I love my Silhouette Cameo!!  The little butterflies were something I had printed off the net, and I added some Diamond Stickles to the wings to enhance.


Materials:

..and my final project for this month...
I used one of the new Julie Nutting, Prima Art Doll Stamps and created a large tag.
Materials:
Paper Lace Doily
 Thanks for dropping by and for leaving a comment ...
Sandie

Friday, October 26, 2012

Its nearly Halloween - Cheery Lynn Designs

It is nearly Halloween!  We don't celebrate Halloween in Australia, though I do believe it is something that is fast catching on.  It would certainly be nice to experience Halloween, and certainly has an interesting story behind the occasion. 

So, to get into the 'theme' of Halloween, for Cheery Lynn Designs I have created a decoration of pumpkins, along with a small 'Boo' tag. Cheery Lynn Designs does have a 'Boo' die, but since we don't celebrate here I have not acquired it.  I hand wrote my Boo, but you can find the die 'here'.
These pumpkins are so easy to create and can be made in in a variety of sizes, easily, and quickly.  AND, would look absolutely fabulous created for a table setting.  I used the Circle Classic Silver Series  (middle size, for the larger one) and die-cut 8 circles - folding each circle in half, and pressing firmly with a score tool.  Hint:  It is easier to do the folding by hand rather than use a score board due to them being round - you really do have to be precise so they match up perfectly. 
Then...simply start adhering one half to the next half, and repeat till you have all affixed, except last one.  Before adhering last half circle together, break a kebab stick with your hands (muscles) to fit inside the length of the circles.  Place a strong adhesive into the middle of where all the half circles meet - place stick along edge of adhesive - keeping the torn, tattered end of the kebab stick at the top, and poking out of the soon to be pumpkin.  Affix last half circle closed, and hold firmly till adhesive has dried, for best results.  

The 'greenery' on the larger pumpkin is created with the Stacker Flower #4, and the smaller, the Stacker Flower #3. I used a crop-o-dile (any small round punch will work) to make the hole in the stacker flower larger to fit over the pumpkin stem, and adhered with a tiny smear of glue.  

The tendrils are created using the new release Expandable Quilling Strip.  The smallest strips on the die-cut were just wound tightly around the left over piece of kebab skewer. Apply a tiny dot of glue to one end, and neatly tuck under the stacker flower foliage.
The  Scare Me die consists of the wicked little tree and cat.  The cat reminds me of my cat Ms Malinki! LOL

... and before I sign off for another week, this weeks challenge is 'texture', to enter visit the Cheery Lynn Designs Challenge Blog... and don't forget to pop over for a visit and some wonderful inspiration from the Cheery Lynn Designs Blog.
Till next week...
Sandie
xxx
Supplies List:
Kebab Skewer
AC Cardstock
Crop-O-Dile
Helmar 450 Quick Dry Adhesive
Tag
Eyelet
Black Diamond Stickles

Tuesday, February 7, 2012

Four Different Flowers - Tutorial - Cheery Lynn Designs


I love making flowers!  So this week I have created some flowers using a range of different Cheery Lynn Designs dies, and created quick tutorials for all 4.  It is important to remember, that any of the Cheery Lynn Design dies can be used to create these version of flowers, the results may vary from flowers photographed, but still just as beautiful.

 Leaf Flower #1
 Requirements:  Stacker Flower #1 (Leaf) and Snowflake 5. Crystal Embossing Tool which is available from Diamond Card Craft. You will also need a set of 3 flowers from the Darling Daisies die. Mini Mister either with water or glimmer mist, adhesive, distress inks, brad, cardstock.
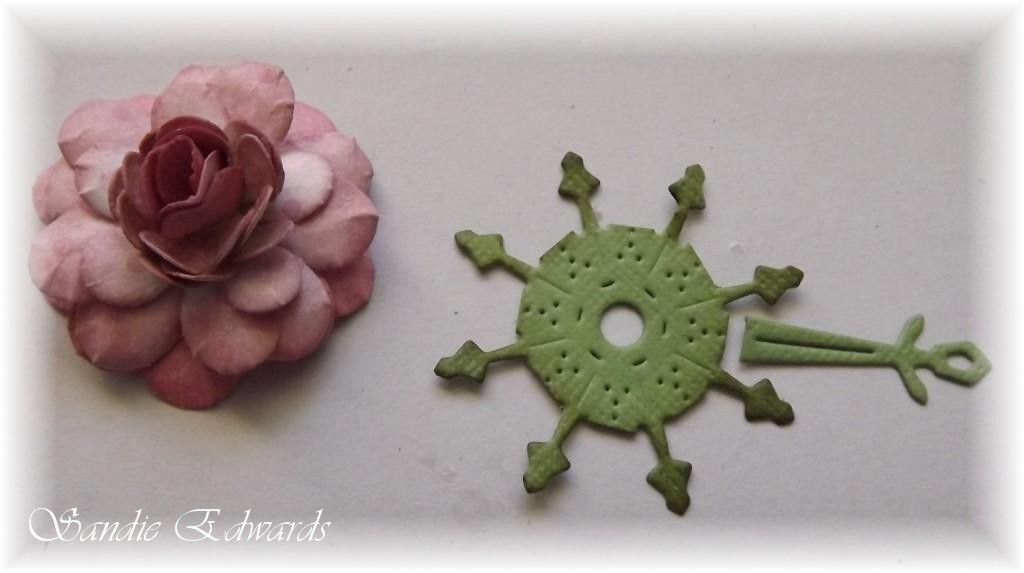
1. Cut out 3 or 4 Stacker Flower #1 depending on how full you wish your flower to be.  I used 3. Cut one Snowflake 5 for the base of finished flower.  
2. Ink all edges to your liking. On a foam mat (mouse mat works well) use a skewer to impress the centre of leaves - this is where your brad will go when flower is constructed.
3. Mist all of your leaves/petals and while the leaves are damp, roll using a skewer.  I find a skewer the best as it is a small size.
4. Allow to dry in the leaves newly formed shape - see below photograph.
5. Cut a set of 3 flowers from Darling Daisies die in varying colours. Turn each flower upside down on your mat, and using your embossing tool curl each petal upwards.  Remember, your flowers are curled upside down. 
6. When all flowers have been slightly curled, turn right side up and press a skewer or small ended pen into middle.  This is where your brad will sit. 
7. Adhere carefully (I use Glossy Accents for a quick dry) the 3 flowers together as below.
8. Start assembling your flower together. Three small Darling Daisies first, then the 3-4 Stacker Flower #1, and your Snowflake 5 at the base.  Once assembled, fiddle with the petals of your flower to get them how you would like them to sit.  *see photo below. 
9. I adhered small pearls onto the ends of each snowflake point to give the appearance of small buds. 
Dies Used:


Sweet William Flower
Requirements: Sweet Williams die, and Stacker Flower #4. Distress Ink, Brad, Adhesive, Cardstock, Shimmer Paper.
 1. Cut 3 large Sweet William petals, 3 small petals, and 1 Stacker Flower #4, ink edges.
2. *see photo above - Fold each petal in half and then each half again in half, the opposite direction - much like a fan.  This is fiddly and time consuming, but the results are worth the effort.
 3. Assemble the 3 small Sweet William petals together, adhere making sure each petal layer sits neatly between the other petals - in other words, leave no gaps.  Do not adhere petals one on top of the other, make sure you adjust so petals sit over 'vacant' area between petals.
4. Repeat for 3 larger petals.
 5. Place glue into centre of larger petal base flowers, add smaller petals and press firmly with the end of a pen into middle. 
 6. Pressing firmly raises the petals upwards and helps form the fullness of the flower. *see photograph below.
 7. Add the Stacker Flower #4 to base of flower, thread through the brad and secure.  *if you do not have brads, you could always adhere a pearl to centre, as the adhesive keeps the flowers together as you construct each flower anyhow.
Dies Used:
Sweet Williams


 Judy's Blooms - Flower 3

 Requirements: Judy's Bloom, Snowflake 6, Darling Daisies, Cardstock, brad, distress inks, skewer and pearls.

 1. Cut 2 of each petal from Judy's Blooms, and the middle sized flower from the Darling Daisies.
2. Use a skewer to roll each petal as shown in above photograph.  *please note:  each petal from each die cut has been rolled in two different directions.  Base petal is rolled downwards, next upwards.  Repeat for smaller petals.

 3. Adhere larger petals together, so that the rolled petals interlink between each other.  *see photograph above. Repeat for smaller petals and add the medium Darling Daisies petal into centre of smaller petals.

 4. Adhere the two layers of petals together, pressing firmly in middle with end of a pen.  
5. Place brad through flower, attaching the Snowflake 6 to the base - add pearls to each point if desired.


 Rose
 Requirements: Miniature Rose, Medium Rose, Large Rose and Snowflake 5. Crystal Embossing Tool which is available from Diamond Card Craft, cardstock, paper, glue and distress ink.

 1. Cut a range of petals for your rose from the Miniature Rose, Medium Rose and Large Rose. How many petals you wish to add, depends on the fullness you wish to achieve.
 2. Use a mouse mat and embossing tool to curl your Large Rose petals.  The larger bottom layers are created by laying petals upside down on matt and embossing so that when the right way, the leaves are curled downwards.  Repeat this with several of the Medium Rose petals. 
3. Adhere the petals into 'doubles', making sure you have the right sizes together. *see above photograph. For my rose, I used 4 large petals for the base, and adhered two medium petal on top of of the larger petals.  This creates the 'base' of the rose.
 4. Curling your medium rose petals the opposite way - upwards, start layering on top of your flower base to the fullness you desire.
 5. Using the Miniature Rose, cut 2 petals from die cut and roll to form a bud.  Adhere the remaining petals around the bud, to complete the centre bud.  *See photograph above and below.
 6. Carefully adhere your centre bud into the middle of your constructed rose base to complete your rose. 
7. Remove longer portion of Snowflake 5, as pictured below. Adhere to base of rose.
 8. Fluff the petals when glue has dried to how you like your rose to look.
 Dies Used:


Hope this inspires some beautiful flowers to be made!
Don't forget this weeks challenge on the Cheery Lynn Designs blog! The theme is "Red and White" - all details can be found "HERE".

Wishing everyone a fantastic and creative week...
Sandie

Tuesday, December 20, 2011

Flower Gift Box & Gift Tag

This week’s creation is a gift box and tag, decorated using an array of Cheery Lynn Designs flowers, foliage and borders. The box itself measures 7 inch square, so a great size for an arrangement of flowers...and perfect to host a pile of chocolates inside.
For the centre flower, I used ‘all’ of the stacker flowers (each stacker flower was cut twice – all up 10 layers) and built lots of dimension through fluffing the petals up.  The centre was created using the Large and Medium Rose.  All in all, to build the larger flowers in this arrangement, I did not stick to one die; each flower has mixed dies to make one flower.  

I totally adore the little tiny daisy like flowers made from the Darling Daisies die. These die cut flowers can be built up into many different sized flowers, just by combining the different sizes.
I used “Dazzling Diamonds” glimmer mist over my whole project, which left the most glorious shimmer to the whole project – including the gift tag.  This can be seen more so if you enlarge the flowers.  Dazzling Diamonds is such a pretty glimmer mist to use on 'any' project, as it does not over-power in colour - just adds a shimmer affect.
The new release French Flair DoilyStacker was used as a base of the arranagement, along with the Large SunflowerDoily.
The borders used around outside of the box are the Anastasia and Border Carnival dies. Ribbon was used to finish, and a bow added.
The challenge theme for this week is “Tis the Season”, you can view all the challenge details by clicking “Here”... and may even win the $20 voucher. Also, this week there is a guest sponsor as well, Di's Digi Downloads, offering a $10 voucher!  I am looking forwards to seeing the entries...


There is a little time before Christmas left....so I am off to create!
Sandie

Dies Used: