


Copyright 2006 Sandie Edwards
Feel free to use this tutorial to learn and share it around, but please do not use it for monetary gain!!
I wrote this tutorial some years ago and it has been published several times. It has been years since I brought it out in the open, I thought I would place it upon my blog to share with 'all'.
Hand Dyeing/Painting Lace, Ribbon & Threads
Equipment:
Assortment of Dyes in Various Colours
Old Kitchen Oven Trays or Cheap Plastic Trays
Several Sized Paint Brushes in Smallish Sizes
Bowl or Sink of Water
Large Container of Water to Rinse Brushes
Old Tea Towels x 2
Assorted Laces, Ribbons or Threads (You can do fabric this way, but suggest you use smaller fat ¼ size)
Several glass or microwave safe plates
Pine O Clean (disinfectant)
Fabric Softener
Fabulon (Ironing Aid)
Gloves A Must!
Iron
Microwave (or you can place in a zip lock plastic bag and place in a sunny windowsill for 24 hours)
A few things to remember before beginning - always work in a ventilated area with windows open. Gloves are a must, or you will run around for a week (or more) with
brightly coloured fingers/hands (trust me here, I've done it more than once). Old clothes, unless you like working in vinyl aprons. If you have long hair, and blonde like me, tie it back .. LOL … pink streaks are no longer in.
Word of Warning: Dyes DO stain! I work always in my kitchen, using the stainless steel – which will not stain. However, believe me when I say ….. you will be amazed just how far dye can go and where it lands. It’s better to cover up with newspaper than having a floor that is multicoloured or a bench much the same. The dye does NOT remove easily, if at all.
I work in small batches, doing all my lace first. This is the most time consuming and back breaking leaning over the sink ‘painting’. Ribbons and threads are so much easier!
Now before we begin, the types of dyes I use. There is a huge variety out there and if you want to go delving into the making of your own, it is quite a full on venture, but a good one. However, even though I have done this - I’ve found several other products which are wonderful in every way, shape and form. I have been using them for around 14 years now.
Maddies Dyes – were once available online, but a search of google has proved me otherwise. I have not brought from them in several years. But their dyes were my favourite and the best. Luckily I brought several packets! They came in 3 small tins with red, blue and yellow powder form dye. You mixed each lot with 1 litre of water and had enough dye to last you many years. With the 3 primary colours you mixed to create 3 litres of dye, one litre of each colour. I added 1tbls of pine o clean to each litre so mould would keep at bay. I use pine o clean in ALL my dyes.
As I mix each dye colour I add a teaspoon of Pine O Clean, this will keep them for years. If you do not add the pine o clean, the next time you go to use them, you will have ‘mould’ particles floating about within container. These mould particles hold the dye and if placed onto your lace, those particles hold strong dye and you will get the most awful result. Needless to also say, that mould of any type is not good for your precious ribbons, laces, etc. .
The other dyes I use are from “Earth Palette Dyes”, another WONDERFUL dye and value for money. The dyes are strong in colour, and are already mixed ready to use. Of course you only use straight if you want the boldest of boldest of colours. I tend to mix 1 tablespoon of dye and keep adding water till I get desired strength.
(You will need many small bottles, jars) Each dye colour can be a different strength, so the amount of water you mix with say ‘teal blue’ may be half a cup, where as “gold” will be only a few tablespoons. It’s best to experiment, adding little bits of water, rather than a lot all at once. I used white cotton small pieces of fabric to colour test and also use these cotton strips for when mixing colours. I place them all into an old scrap book and write the dye ‘mixtures’ next to each colour.
This is Earth Pallete’s website for ordering.
Alaine is lovely to talk to and so is her husband. (Since writing this tutorial, Alaine has passed away due to illness – very sad)
The dye to use through Earth Palette is the “silk dyes”. I’ve dyed fabrics, threads and ribbons with this dye for many years and as long as you use the microwave method you will have wonderful and very colourfast results. I’ve not had one piece fade at all, or wash out.
If you go to their website and click on ‘products’ … then go down to “silk dye kit” this is the best way to order. However, several of my very favourite colours Pink, Purple & Olive do not come in the kit. Also ‘playing’ with the colours in small amounts, writing down what ‘amounts & colours’ …. Will give you a whole new range of colours!
Getting Started with Lace/Motifs
Gloves on, windows open, dyes out with lids off (no bumping of bottles) place your lace or motifs into the sink of water and just leave sitting there. Your motifs are safe in water from any dye you splat about the place … LOL If you want really bold colours, omit the soaking in water.

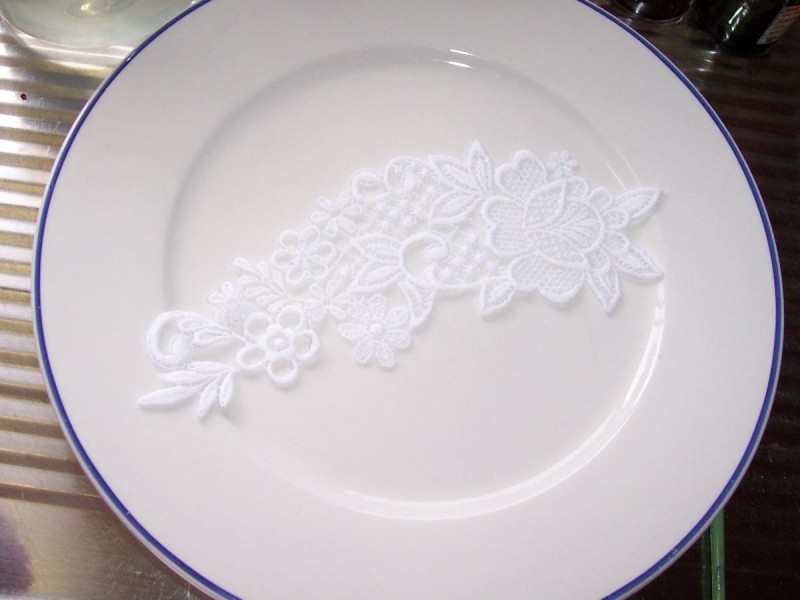
Grab one piece of lace out of your sink of water and using your old tea towel place lace inside towel and gently dab to get rid of excess water. Do not over dab, just enough so that your lace is damp. Lay lace flat onto the stainless steel bench of your sink, OR your plate being careful the lace is flat and no tiny bits are curled under anywhere.
I always paint any flowers first, (OR leaves) starting with the very centre of your flower. Don’t overfill your brush with dye; a little goes a long way. Using one colour gently ‘paint’ from the inside out, I never go all the way to the edges with a new brush-full of dye, it will bleed into other area’s you do not want it to go! You are better off using a ‘little’ dye and building up through this whole process.


If you use too much dye, you cannot remove, but you can always add more dye if needed. Some colour will seep, so don’t panic if this happens, it will add to the effect of your finished piece.
Take your time and don’t rush, this is most important.
With your other old tea towel, gently dab away any excess dye that has pooled, don’t over dab, as you will lighten the colour.


With your 2nd colour, you want a more ‘deeper’ colour. Don’t be afraid to experiment, if you are doing pink, try gold in the centre, or purple, even olive.
Using tip of your brush filled with dye, just lightly touch the centre of your flowers, just enough to darken the middle. If you use too much dye, use a clean part of your tea towel and dab.
When I find that I want a more subdued piece and the lace I have dyed has turned out quite bright, I then go over lightly the whole piece with “olive” dye. It gives you the most beautiful and antique appearance. *See Photos and explanations.

This was way too bright for me, the blue was out there and so was the yellow. So I done a couple of light coats of 'olive' to mute the colours.

What a huge difference there is in colour once I used the 'olive'.
Next leaves – you should have two greens, if you only have one; there is a trick to getting a 2nd without mixing another green. Paint your leaves in the same manner as your flowers, careful with the amount of dye, so any other parts of the lace that you wish to be a different colour do not soak the dye up. Don’t panic if that does happen though! Once all leaves are painted, using a gold, olive or coffee coloured dye, just wipe your brush over one side of the leaf. This should cause a more muted and different colour green. Dab away excess dye.


Look at your lace and see what is left to dye, using colours of your choice, fill in blanks, add more colours …..Use your imagination.
One thing I forgot to tell you, lol … always rinse your brush between colours!!!!
I do one lace per plate, and I zap in the microwave for around 15-25 seconds before placing on a tray out in the sun to dry fully.
One dried fully, I place in a small fresh sink of water, which has fabric softener added, just rinses any dye residue out and the fabric softener stops static and smells delightful.
If you find your lace has dried and the colours have lightened, before you rinse you can add more dye once again to highlighted area’s if you wish. Always remember to put your motif into water first… otherwise you will have very bright lace motifs.
If you find your lace has dried and the colours have lightened, before you rinse you can add more dye once again to highlighted area’s if you wish. Always remember to put your motif into water first… otherwise you will have very bright lace motifs.

When happy with your finished pieces and they have sun dried … and your sitting there admiring and thinking … “gee, they are pretty”, you can get your ironing board out and iron (Silk Setting) each motif with using some spray starch. Always iron your lace/motifs on the back ….
How to tell the back from the front, the front always mostly has a nice sheen.


In the photo below, the lace is backwards, can you see there is no sheen, compared to other two photos?

I’d love to see some photos of lace, threads, ribbons you dye.. And if I’ve missed anything or you don’t understand something …. Don’t be afraid to jump in and ask questions. Am only too happy to help if I am able too.
Once you have tried dyeing, you will be totally hooked ….. and have a wonderful time in creating.
Once you have tried dyeing, you will be totally hooked ….. and have a wonderful time in creating.
Colour Mixing
Using primary colours, RED, BLUE, YELLOW you can mix all colours. However, the original base colours of red, blue and yellow must be TRUE colours to be able to mix with good results.
When I use “part” below, 1 part could be: 1 eyedropper, 1 cup, 1 teaspoon.
Teal Green: 1 part yellow, 2 parts blue
Fresh Bright Green: 3 parts yellow, 2 parts blue
Orange No 2: (salmon or peach) 1 part yellow, 2 parts red
Orange No 1: (apricot) 2 parts yellow, 1 part red
Plum Pink: 3 parts red, 1 part blue
Old Gold: (one of my very favourites) 10 parts yellow, 2 parts red, and 2 parts blue
Violet: 1 part red, 1 part blue
Burgundy: 2 parts yellow, 2 parts blue and 4 parts red
Remember to dilute your colours and add pine o clean to store.
Instructions for Mixing Dyes
| Colour desired | Red | Blue | Yellow | |
| Lavender | 4 | 8 | - | |
| Plum | 6 | 2 | - | |
| Scottish Green | - | 6 | 4 | |
| Old Gold | 2 | 2 | 10 | |
| Taupe | 4 | 4 | 4 | |
| Moss Green | 1 | 2 | 8 | |
| Violet | 4 | 4 | - | |
| Teal Green | - | 4 | 2 | |
| Tan | 5 | 3 | 10 | |
| Rich Burgundy | 4 | 2 | 2 | |
| Apricot | 2 | - | 4 | |
| Salmon | 4 | - | 2 | |
| Orange (apricot) | 2 | 1 | - | |
9 comments:
Thanks for sharing! In my mind when you told me about dying I just presumed chucking the whole piece of lace in a bowl of dye then take out and dry. lol.
This would look beautiful on some scrap layouts I have in mind.....
LOL There is a lot more to hand-dying than meets the eye, it is a load of fun!! I love incorporating lace into my layouts and other creations.
You'll have to find some nice lace pieces Marjke, so we can play with DYE!
Hey! Many thanks for your blog! Actually I have never read anything that great.
You are more than welcome .... hope you get to do some amazing lace painting!!! Thanks for the comment ..
Thank you for your entry! Actually I have never come across anything that informative.
Wow! Great tutorial Sandie, you certainly have a knack for all the little details!
how much pine o clean do u use?
how much pine o clean do u use n thx for the awsome tut <3
Hello and thank you for sharing your dyeing technique which is very instructive indeed, however, I suppose that for cotton lace which I intend dyeing, this would not work, as your lace is a synthetic one I believe.
Never the less I intend to follow your instructions where synthetic lace is concerned.
By the way your work is really delightful to look at.
Sandra Tavel
Post a Comment