Showing posts with label Fern. Show all posts

Tuesday, February 21, 2012

My Daughters, "All Grown Up" - Cheery Lynn Designs


Hi Everyone,  this week for Cheery Lynn Designs I have created a mini canvas (6" X 6").  The photograph is a recent photograph of my two grown up daughters, Amanda and Tayla at Aldinga Beach, in South Australia. Amanda (on the left) is the Mother to my beautiful Grandson, Tyeson.  As for Tayla, I cannot believe how much she has grown since we left S.A in November, 2010. Oh, and apparently it is the in thing to have your photograph taken with your tongue out (insert groan 'here') - and here I was thinking what a lovely gesture to lick your big sister!! LOL 


The base of the canvas is corrugated cardboard, which I gessoed, and distress inked (Black Soot) to achieve a corrugated iron appearance.  Maybe I should have added some silver, but I'm happy with the results.  The photograph base was cut from the French Flair Classic Stacker Series. Beneath the photograph is the Spiderweb which I brushed lightly with stickles to give a shimmery appearance. 

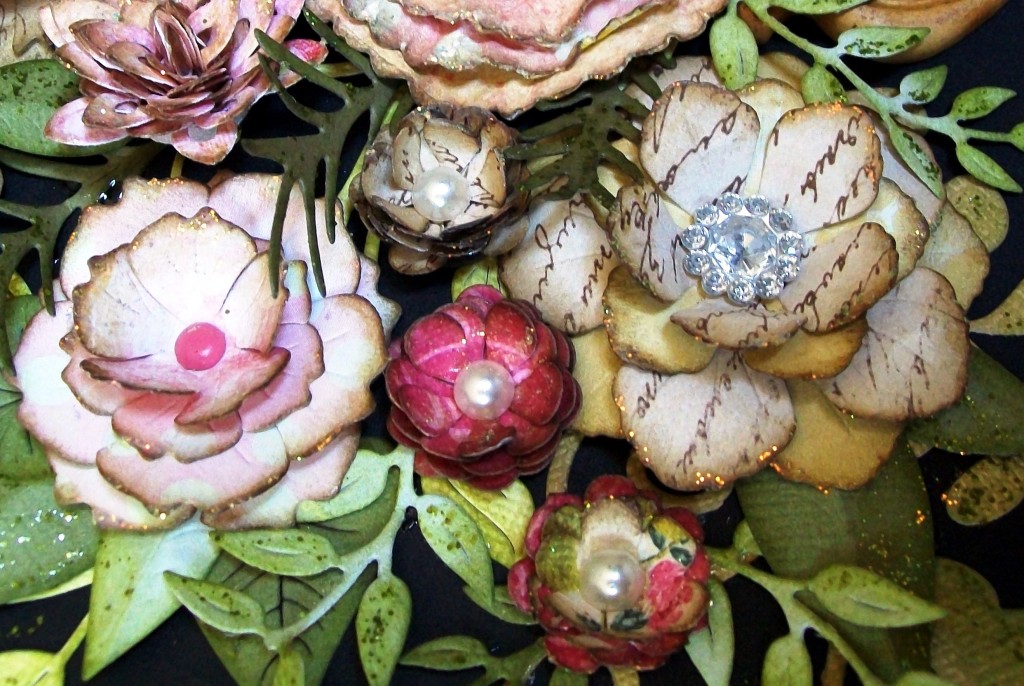
The flower and flower buds were created using the Judy's Blooms die.  I cut two die-cuts of each die, misted lightly the petals with water, and curled the leaves using a kitchen skewer.  After assembling the flower, the curled edges were inked using Victorian Velvet distress ink, and a pearl added to the centre.  The flower buds were created using single cut petals from the Judy's Blooms larger flower die cut - the green bud casing was created using the leaves from the Pair of Ferns.  The foliage consists of the Fanciful Flourish, and Olive Branches.

I used Imaginarium Designs "All Grown Up" (#IDP0027) chipboard phrase, which can be purchased from Seriously Scrapbooking.  The chipboard element had a liberal amount of texture paste applied, and then inked using Victorian Velvet distress ink (several layers of ink as it does soak into the texture paste).


Several brass charms were used from my stash.  I adore the detail in the bee and spider!  Stickles was applied to the outer edges of the flower petals, buds, and butterfly - just enough to highlight the applied distress ink.  Stickles tends to really draw out the colour of distress inks.


..and one of my very favourite dies - it is one that introduced me into Cheery Lynn Designs, the Exotic Butterfly Small.


 Before I sign out, this weeks challenge theme on the Cheery Lynn Designs blog is 'Frame It' - all the details can be found "HERE". You have a chance of winning a $20 shopping voucher to spend in-store.

Have a wonderful week...
Sandie

Dies Used:


Tuesday, January 31, 2012

Cheery Lynn Designs - Baby Boy Brag Book


Front Cover
Hi Everyone..  This week for Cheery Lynn Designs I have created a "Baby Boy, Brag Book".  I was reading a thread on a forum recently about how difficult it is to make a baby book for a boy, as you cannot add flowers.  Well, for me personally - I add flowers, I just make them "BLUE"!!

Due to the length of this post, I will not go into the nitty gritty details - just wondering if nitty gritty is an Australian saying, so will explain it means 'small details'. 
Close Up of Medium Rose
Above is a close up of the Medium Rose, which is constructed by rolling the middle, and building up in layers.  You can make them tight, open, or however takes your fancy. I will do a tutorial soon on how I do my roses, as it seems all of us DT girls do ours differently.

Page 1
The flowers on Page 1: The large flower with button, being made from the Cuties 4.  The smaller white flowers are from the Flower Chain Border (I just removed flowers from border), I included the medium sized Darling Daisies in the middle of each - they replicate stamens.  The tiny flowers are the inserts to the Snow Flake Edger Border die.  I really like those inserts, they could have 'many' uses when making flowers!

Page 2 below, I embossed the cardstock using the Black Eyed Susan Embossing Plate.

Page 2
Page 3
Page 3 and 4 (above and below) I have used the Cheery Blossoms and Dimensional Leaves.

Page 4
Page 5 (below) I used the Roses and Leaves Embossing Plate.  I love the beautiful detail of the embossed design using the Cheery Lynn Designs Embossing Plates, in conjunction with the Embossing Kit!! The French Flair-Classic Series was used to create journaling areas.

Page 5

Page 6
Page 6 (above) includes the Medium Rose, constructed more in a flat manner and not 3 dimensional.  I just used an awl to round the leaves on a computer mouse mat. 

Page 7
Judy's Blooms, and the Stacker Leaves on Page 7 (above), I always double the layers of the die to create more volume.

Page 8
The flower on Page 8 (above) was created using the new release Fransesca Border die.  To create a flower like this, all you need to do is score at regular intervals over the whole die cut, and fold like a fan.  Adhere the two ends together with a strong adhesive, and push down to form flower - adhere to the smallest circle in the Scalloped Window Stackers Series.

Page 9
Another rose using the Cuties 3 on page 9 (above).

Page 10
Using Snowflake 6 to add a little character to my flower arrangement.  Snowflakes can be used in so many other creations, besides winter or Christmas!
Back Cover

Journal Tag
Dies Used:
B154 Medium Rose

Do not forget this weeks challenge, with the theme being "Sweethearts", all the details can be found "HERE".  You have a chance of winning a $20 shopping voucher!!!  

I am entering my brag book into the following challenges:
Die Cutting Divas with the theme "anything goes"
also... My Time to Craft Challenge Blog with the theme "A for Adorable"
Have a great, and creative week...
Sandie

Tuesday, December 20, 2011

Flower Gift Box & Gift Tag

This week’s creation is a gift box and tag, decorated using an array of Cheery Lynn Designs flowers, foliage and borders. The box itself measures 7 inch square, so a great size for an arrangement of flowers...and perfect to host a pile of chocolates inside.
For the centre flower, I used ‘all’ of the stacker flowers (each stacker flower was cut twice – all up 10 layers) and built lots of dimension through fluffing the petals up.  The centre was created using the Large and Medium Rose.  All in all, to build the larger flowers in this arrangement, I did not stick to one die; each flower has mixed dies to make one flower.  

I totally adore the little tiny daisy like flowers made from the Darling Daisies die. These die cut flowers can be built up into many different sized flowers, just by combining the different sizes.
I used “Dazzling Diamonds” glimmer mist over my whole project, which left the most glorious shimmer to the whole project – including the gift tag.  This can be seen more so if you enlarge the flowers.  Dazzling Diamonds is such a pretty glimmer mist to use on 'any' project, as it does not over-power in colour - just adds a shimmer affect.
The new release French Flair DoilyStacker was used as a base of the arranagement, along with the Large SunflowerDoily.
The borders used around outside of the box are the Anastasia and Border Carnival dies. Ribbon was used to finish, and a bow added.
The challenge theme for this week is “Tis the Season”, you can view all the challenge details by clicking “Here”... and may even win the $20 voucher. Also, this week there is a guest sponsor as well, Di's Digi Downloads, offering a $10 voucher!  I am looking forwards to seeing the entries...


There is a little time before Christmas left....so I am off to create!
Sandie

Dies Used:

Tuesday, December 6, 2011

Memory Album - Cheery Lynn Designs


I had a wonderful time creating this week for Cheery Lynn Designs, with a die series I had not used previously.  With the “Special Moments” A2 Scallops and Rings die, I created a memory book.   These books are quite simple to put together, and would make delightful Christmas presents for those of all ages.  The best part is more pages can simply be added at a later time, depending on how you embellish the book; you could easily fit up to 10 pages (including the front and back cover), if not more. 

The paper collection I used is called “English Rose” by Kaisercraft, the 6X6 paper pad, and of course an assortment of cardstock in various colours.  All edges are inked with Tim Holtz distress ink, in the colour of “Walnut Stain”... my favourite for a more vintage appeal.
 For my creation, I left the pages blank. However, there is plenty of room for journaling, and adding in photographs or memorabilia. 

 
Each page is decorated with a variety of die-cuts – the front page being the fancy one with an array of doily dies (English Tea Party & French Pastry), flowers and foliage.


On page “Four”, I have created a flower using the Anastasia Border die, by cutting the die and placing on my Scor-pal, scoring every ¼”. Next, I folded the scored area like a fan, and used a strong adhesive to hold in place – I adhered the newly created flower onto a 1 inch cardstock circle, added a pretty bling piece to the centre, and voila - one flower created.

 Page 4...above

 
On page “Six”, the flower is created from the Heartland America die pieces left over from last weeks, “sending my love” card.  All I did was add dimensional tape between the layers, so simple and yet, so effective.  Its wonderful being able to create something ‘pretty’ with left over die cuts...
  Page 6...above


The back cover is a pocket, which I have placed half a dozen tags – though, this could also be used to store/hold letters, notes, photographs and other memorabilia. 


I do hope my project has been inspirational, and some individuals will be encouraged to create a Cheery Lynn Designs “memory book”...
...and before I sign off till next week, please don't forget the Cheery Lynn Designs challenge taking place each week at the moment.  This coming week the theme is "silver & gold", all you have to do is get creative and use at least one Cheery Lynn Designs die to be in the running to win a $20 shopping voucher... Look forwards to seeing what everyone creates!!
Till next week
Dies Used:

Tuesday, November 22, 2011

Floral Arrangement

(completed project measures 11" X 9")

Hi Everyone,
This week’s creation was inspired by the wonderful dies at Cheery Lynn Designs, and the beautiful, spring weather we are experiencing at the moment in Australia, though it won’t be long and our summer will arrive...  those blooms will soon wilt, but not my flower arrangement!!

For my project, I have used a lot of dies, and created an arrangement which has a three-dimensional appearance.  I have tried to photograph the arrangement so that this can be seen clearly.  There are leaves, flowers, flourishes, pine branches, etc popping up all over the place.
It seriously is not that hard to put together, just time consuming, so do not be afraid to give it a go.  My ‘handy hint’ would be to lay die cuts where you think they should go, when happy with the arrangement, take a photograph to refer back to.  You can then pull apart your temporary arrangement, and use your photograph as a guide.

Firstly, I made all my flowers, inking and rounding edges – the flowers I used are: Sweet Williams, Judy’s Blooms, Flower Chain Border, Cuties 1, Miniature Rose, Cherry Blooms and the ScallopedWindow Stackers.  The Scalloped WindowStackers flower was created by inking the edges, and then spraying the die-cuts with glimmer mist.  While the die-cuts are wet, just crinkle into balls, before gently folding back out – when still wet, add a pearl/crystal brad centre, then place flower aside to dry, making sure your petals are the way you want them.  Easy!
The “Flower Chain Border” I simply cut the flowers from the border, placed on a mouse mat, and curled with a pop-stick edge!!  Yes, I do have the fancy tools, but I prefer the more simple – they work better for me!  J

The leaves and flourishes I used are:  Tropical Flourish, Pair of Ferns, StackerFlower 1 Leaf, Fanciful Flourish, Tropical Leaves, SM Leaves 2, Pine Branches and Olive Branches.  The Olive Branches played a large part in the 3D appearance.  I adhered the small end of the branch and when dry, curled the leaves upwards (or wherever I wanted them to go).   All the leaves edges were inked, some glimmer misted and others have distress stickles as well.
Border Carnival was added as the ‘tablecloth’ – and of course, I just had to add a couple of butterflies, and a dragonfly.
The urn or vase is an item I have had in my ‘stash’ for quite some years, but I am sure a google search (gosh I love google!!!) would bring up a mountain of sources to buy from. OR, perhaps create your own out of some clay!
Dies Used:


The theme this week is "Red& Green"

The rules are:

1.You must follow the ‘theme’ in place, and use at least ONE Cheery Lynn Designs die, though of course we would love to see more!! J

2.You must add a link to your blog post (not just your blog) using the Inlinkz, found at the end of this post.No back posting, only new projects please.

3.You must link to our blog in your post.
I am entering my creation into My Craft Spot's, Challenge #34 - "Handmade Flower Power".... please call over and have a look at the lovely DT creations, and perhaps, even enter yourself!! 


Also, I'm entering Challenge #6, over at Crafty Ribbons Challenge, #6, where the challenge is "anything but a card"!  You have to see the DT's creations, some really unique and unusal items... I especially love the cake - wow!!!
and
Fussy and Fancy Friday, also have a challenge taking place "Making a Gift/Anything but a Card".

Well I hope you have enjoyed my creation this week!  I wish all those celebrating “Thanksgiving” on the 25th, a special time with family and loved ones....

And to everyone, happiness always, no matter where you are on the globe!!